Lifts and Escalators: A Quality Perspective
Contents[hide] |
[edit] Introduction
Lifts, escalators and passenger conveyors, known as LEPC hereafter, are a significant part of almost every major building construction or refurbishment project. This guide has been designed for quality professionals tasked with the facilitation and management of quality activities on projects where there is LEPC construction or refurbishment works.
The challenge of the quality professional in this field is the highly technical nature of LEPC assets and the myriad of legislation and requirements to which works on these assets has to comply. This paper provides a high-level guide to the critical and often forgotten issues that can occur during LEPC related projects.
[edit] Design considerations for lifts and escalators
[edit] Lifts
Whilst recognised as inherently safer to use than an escalator or passenger conveyor, lifts are the most dangerous and challenging when it comes to construction and refurbishment.
[edit] Shafts
In terms of the basics of construction then, for new lift installations the first step where the quality professional can add value to the project is in the design phase. This starts with the first options of what type of shaft will be used.
Typically, there are two types of shaft: concrete or steel. If it were the decision of the lift supplier then concrete is nearly always the preferred option. This is due to the simplicity of the structure, essentially a concrete box built up throughout the levels, which leaves a clean finish for the first stage of lift installation. The use of a concrete shaft removes the need for what is known as secondary steel (explained further in this section) since the bracketry to which the lift and counterweight guides are attached fixes directly into the concrete.
[Figure 1: Typical concrete shaft arrangement showed during construction]
Steel however is often the choice of the architects and designers, especially where there is an abundance of glass in the structure, as seen in many modern buildings. The challenges here are that secondary steelwork (term used for non-structural steel) is required to create points throughout the length of the shaft to which the lift car and counterweight guides can be attached.
[Figure 2: Steel shaft arrangement showed for a duplex (pair) lift installation. Note the grey secondary steelwork brackets supporting the lift car guides.]
A challenge with secondary steel construction regards which trade or subcontractor is going to install it. The preferred option (though probably not in the opinion of the lift supplier) is to have the lift supplier subcontract the secondary steel installation. This allows the control of the design and installation liability to be better coordinated and thereby reduces the risk of rework and delays. It is noted that this may not, at first sight, appear to be the most commercially attractive strategy.
The best way to mitigate the risks of rework during construction of lift shafts is to ensure the design is coordinated between the relevant trades. This starts with the architects consulting with the lift supplier, and steel or concrete fabricators. This is an activity the quality manager can facilitate either from the client side or principal contractor’s side, usually coordinated by the design manager. It is also noteworthy at this stage to clarify that the lift shaft should never be used as a services route, the only services allowed within a lift shaft are those that have a direct link to the lift.
[edit] Tolerances
The other key design consideration is the definition of construction tolerances, particularly bearing in mind the potential impact of: their cumulative impact; the precision expected of differing construction/installation activities; and the potential impact of incompatible variances (eg alternating positive and negative deviations).
For new installations, the architect is generally accountable for ensuring the building has been designed with adequate consideration to the fitment and placement of the lift shaft, whether it be steel or concrete construction. It’s imperative that the architect engages with the chosen lift supplier to agree and include the lift shaft dimension and requirements. To support this activity, it is the lift supplier’s role to provide lift shaft layout drawings for the architect to incorporate into the overall building design (see Figure 3).
[Figure 3: Typical steel lift shaft layout drawing (supplied by the lift supplier)]
The drawings produced for the lift shaft then need to be reviewed and agreed with the steel erector or concrete construction contractor depending on the type of shaft. It is the role of the quality manager to ensure this coordination is incorporated in the early design programme and all relevant information has been shared and agreed between the architect, steel / concrete contractor and lift supplier. The tolerances required by the lift supplier should be achievable for the construction method used, included in the construction drawings and agreed and understood by the contractor.
During the lift shaft construction, there should be hold points within the build where lift shaft tolerances are checked and confirmed against the construction drawings by the contractor. Upon completion there will then need to be a ‘hand-shake’ between the lift shaft contractor and the lift supplier. This should entail a series of pre-handover checks completed by the lift supplier where the lift shaft is measured and tolerances are checked. In addition to the dimension aspects of the lift shaft there are also many other additional checks the lift supplier will need to complete, an example of a lift shaft handover check is shown in Figure 4:
| Description | Complete | |
| 1 | Shaft dimensions and tolerances as per lift supplier drawing | |
| 2 | Complete and watertight shaft and adjacent/ common areas | |
| 3 | Suitable access to lift shaft and adequate storage area available | |
| 4 | Datum levels at each floor entrance and grid lines available. | |
| 5 | Pit clear of debris and maintained dry. | |
| 6 | Shaft and scaffold cleaned down. | |
| 7 | Adequate temporary 16 & 32 amp 110 volt power located at top floor adjacent to lift entrance. | |
| 8 | Adequate temporary 415V supplies as agreed | |
| 9 | Primary steelwork in position and complete as per lift supplier layout drawing | |
| 10 | Drylining complete and openings closed up | |
| 11 | Rough door opening dimensions as per Schindler drawing. | |
| 12 | Opening for Control panel (top floor only) as per lift supplier layout drawing. | |
| 13 | Cut outs for landing fixtures in accordance with drawings (plus fire switch cut out for firefighting units). | |
| 14 | Shaft ventilation (if applicable) | |
| 15 | Cable installed for fire recall facility (if applicable) | |
| 16 | Smoke detector within top of shaft as per building regulations (if applicable). |
[Figure 4: Typical lift shaft handover checklist]
Once the lift shaft has been deemed suitable for acceptance by the lift supplier it is also recommended that a formal handover document is produced which moves the responsibility for the lift shaft from the contractor to the lift supplier. This should incorporate a permit system to ensure that any other trades wishing to complete works within the lift shaft do so under the control and permit provision of the lift supplier.
[edit] Escalators and passenger conveyors
Escalators and Passenger Conveyors are by design in most cases fully manufactured and tested off-site, and are considered as machinery. This means that the selection of the appropriate escalator or passenger conveyor is a lot simpler than that of lift selection. The most important point is the integration of the escalator or passenger conveyor into the new or existing building or structure. The designers should engage formally with the manufacturer to obtain the dimensional and load information required to complete an adequate design for the selection and location of the machine, as well as the environmental considerations required by the relevant standards, including EN115-1 & 2 where applicable, most notably lighting levels and clearance.
Operationally, consideration should be given to the speed of the machine, any client requirements in the area, and also to how the machine operates. Modern machines have the ability to slow down and stop after periods of non-use and have a traffic light and sensor arrangement fitted to each end to start-up the machine when approached by a user. The timings and settings for this operation need to be agreed during the design stage as the number of starts and stops each machine can make in an hour has a bearing on the duty of the machine and therefore size, loadings and cost. Also to consider here is that of the emergency stop arrangements, if the machine is to be installed in a location that is not supervised (railway station, shopping centre perhaps) then there are options for automatic re-start in the event of an emergency stop activation. These systems are complex and costly but again need to be defined during design to ensure the machine is designed in line with the client requirements.
Robustness is another consideration especially for machines fitted in harsh areas such as railway stations, car parks and shopping centres. These units need to be of a suitable construction to withstand the rigours and high volume of users associated with the installation and often can include the ability to withstand the impact of inclement weather (rain, wind, etc).
[edit] Samples and benchmarks
Good practice in any project (and one which any quality professional should be part of) is the development, implementation and facilitation of a samples and benchmark plan. This is an often overlooked but invaluable tool used to highlight any potential issues with safety, workmanship, buildability, usability, durability, operability and reliability. It also has the potential added benefit of enabling the setting and managing of the expectations of the client. Typically, people don’t like surprises, so by using a well thought out programme of samples and benchmarks to effectively set and manage people’s expectations ensures a less troublesome handover, mitigates the risk of rework due to product rejection at handover and is a reference point for the project team: to view and touch examples of components, mock-ups or first of type installations; to see what ‘good’ looks like; and to establish the standards that the rest of the build needs to meet.
[edit] Lifts
The typical samples and benchmarks used in a lift project are as follows. This is to be used as a pick list for those most relevant. For larger construction projects it is not uncommon for a complete lift car to be ‘mocked-up’ off site for the client to inspect.
- Lift car ceiling with lighting, access panels and colour
- Lift car operating panel (COP)
- Lift car landing select push buttons
- Lift car preference select key switches or buttons
- Lift car flooring (colour, slip resistance, material)
- Lift car handrails
- Lift car mirrors
- Lift car doors
- Lift car ventilation fans
- Lift car fireman’s access ladder
- Landing architraves
- Landing lift call buttons and mounted plates
- Landing lift floor indicator displays
- Architrave protection bollards
- Lift car door to landing floor interface
- Voice annunciation
- General lighting at landings, controller locations, machine rooms, shaft, pit
- Auxiliary power provisions for maintenance staff (110V, 240V sockets)
[edit] Escalators and passenger conveyors
The typical samples and benchmarks used in an escalators and passenger conveyors project are as follows. Again, this is to be used as a pick list, though these machines are constructed fully during the manufacturing process so it is often worthwhile to perform a factory acceptance test (FAT) in these scenarios as explained in the following section.
- Pallet / Steps material, paint finish, size
- Skirting & Decking
- Protection bollards
- Luggage prevention guards
- Out of service barriers (Tensator)
- Emergency Stop switches and fixings
- Controls and fault displays
- Maintenance key switches
- Under Step / Pallet lighting, colours and type
- Handrail lighting
- Handrail material
- Skirt lighting, colour and type
- Emergency lighting
- Wayfinding & User safety signage
- Fire system interfaces
- General building lighting above and around machine
- Drive assemblies
- Machine rooms (if applicable)
- Safety brakes
- Voice annunciation
[edit] Inspection and Test Plans (ITPs)
The areas which should be reviewed during site surveillance activities should all be referenced and managed through the use of ITPs (Inspection and Test Plans). All well run projects should be managed with the implementation of ITPs. These set out the quality and other requirements for each stage of a project activity. It is important that these are reviewed at the earliest possible moment with each trade and set of sub-contractors. Ideally talk box talks are also given at the commencement of and at key points during the works setting out the requirements and purpose of the ITP.
[edit] Site surveillance
As with any project the quality professional can play a significant role in ensuring that quality requirements are met and done so ‘right first time’. In addition to technical knowledge, key skills and behaviours required for this quality professional role are leadership and engagement.
[edit] Lifts
Specifically, for lifts, site surveillance activities should include focus on the following key areas:
- shaft construction (concrete, steelwork, glass) and alignment checks;
- shaft drainage provisions (sumps and pumps);
- shaft mechanical and electrical services (electrical, fire, IT, telecoms, ventilation);
- shaft fire stopping;
- shaft lifting beams / lifting eyes (if required);
- shaft bunding (hydraulic lifts);
- motor room construction
- motor room bunding (hydraulic lifts)
- motor mechanical and electrical services (electrical, fire, IT, telecoms, ventilation)
- motor room fire stopping
- motor room lifting beams
- landings (entrances, flooring, doors, architraves, lighting)
- landing restrictions (columns, furniture, walkways, corridors)
- lift car construction (lighting, COP’s, flooring, handrails, mirrors)
- lift car emergency alarm (intercom)
- lift car access control
- lift control and calling (duplex, triplex…)
- lift fire system cause and effect (primary, secondary floors)
- lift commissioning (EN81 inspections)
- lift independent inspections (certificates of thorough examination)
- 3rd party use of lift during construction (sub-contractor shaft access via lift car top)
These areas should be used as a guide and not all may be relevant depending on the scope of works being completed.
[edit] Escalators and passenger conveyors
Specifically, for escalators and passenger conveyors, site surveillance activities should include focus on the following key areas:
- machine alignment
- machine drive assembly
- machine functions and controls
- machine testing and commissioning
- user headroom clearances
- fire interfaces (automatic fire doors, dampers, smoke and heat detectors)
- environmental lighting
- 3rd party access to machine during construction (scaffold or work platforms on machine)
These areas should be used as a guide and not all may be relevant depending on the scope of works being completed.
[edit] Builder’s works
[edit] Lifts
This section considers the key points around builder’s works once the lift shaft has been constructed. The typical scope of works and considerations for the builder includes the following:
- Lift Entrances: the setting out and installation of lift entrances is critical for the successful completion of any lift project. This success relies heavily on the lift shaft construction being completed in line with the detailed design drawings, and those same drawings being firstly correct and secondly containing the relevant information clearly for the builder to set out the new entrances. A special consideration in this area is the FFL (finished floor level). This is an area where the quality professional can provide leadership and guidance in ensuring that the ITPs adequately cover the checking and setting of the FFL during construction works and quality briefings can be held highlighting this issue to the relevant subcontractors.
- Lifting Beams / Eyes: virtually every lift installed will require the installation of a lifting beam. These are used to install the motor, drive, lift car and other associated equipment either within the lift shaft or in the machine room. It is imperative that these lifting beams / eyes are designed in line with the requirements of the lift manufacturer and are coordinated between the structural engineer (designer), the lift manufacturer and the installer.
- Machine rooms: hydraulic lifts, larger modern lifts, lifts faster than 3 m/s and some special lifts (e.g. double deck) typically require a machine room. These rooms are normally located at the lower level for hydraulic lifts and the upper level, directly above the lift shaft, for electric traction lifts. Within these rooms the motors, drives, controllers, oil tanks (hydraulic), rope hitches and lifting beams (electric traction) are located.
- Landing ceilings and walls: the interface between trades is a primary area for scope gaps and for unfinished works due to a lack of clarity on which trade is ‘doing what’. The adjoining walls and ceiling around a lift entrance is an example of where this often goes wrong. Care should be taken to consider matters such as who is completing the architrave works around the entrances, how the landing indicators are fitted, how the landing call push buttons are fitted, and how this all interfaces with the chosen wall and ceiling finishes.
- Landing flooring: the flooring interface at each lift entrance should consider the FFL, how the lift entrance can accommodate the chosen floor covering and the gap between the landing floor and the lift itself. Often an additional plate is used to address this interface and, when installed, this should offer a suitable level of slip resistance in line with the relevant standards.
[edit] Escalator and passenger conveyors
This section considers the key points around builder’s works for escalators and passenger conveyors and the typical scope of works and considerations for the builder including the following:
- Civils: preparation for the installation of an escalator or passenger conveyor involves ensuring that the foundations, pits, structural steelwork, etc. are adequately designed and installed in coordination and agreement with the escalator manufacturer. A role of the quality professional is to ensure that the coordination between the relevant designer and escalator manufacturer has taken place; that all the relevant data has been shared; and that any designs have been approved by relevant parties and are at a suitable status (For Construction).
- Clearance: whilst this is not a specific scope of works, it is noteworthy with regard to the compliance of the completed works. For example, a minimum clearance of 2.3 metres is a requirement of EN115-1 (correct at the time of writing) and there are clearances relevant to other elements such as handrails. Protection may also need to be provided against hazards such as trapping or falling. It should be noted that the escalator manufacturer will not actively review any designs for compliancy in this area without prompt or instruction. It is for the designers to ensure that designs are compliant and for the builder to ensure that the completed construction meets those designs.
- Lighting: not specifically a builder’s item but something again for consideration. There are defined requirements for lighting levels on escalators and passenger conveyors. These lighting level designs or existing conditions will not actively be reviewed for compliancy by the escalator manufacturer without prompt or instruction. A minimum lighting level of 200 lux is required for items such as controllers which may need to be accessed for servicing, maintenance, fault finding etc.
[edit] Handover documentation
High quality handover documentation is particularly important with all types of LEPC equipment and must be incorporated into Health & Safety files and the Operating & Maintenance manuals. An item of note is the need for specialist maintenance and ongoing certification of various elements of the installation in order to meet legislative requirements (and to manage corporate risk).
[edit] Appendix Items
[edit] Beneficial use
The term beneficial use relates to the situation that arises when an asset is handed over into operation without being fully completed. This normally relates to the completion of the asset documentation, drawings and close out of snag items. Often on major projects lifts and escalators are handed over into beneficial use to allow these assets to be used whether in operational trials, soft start-up or full in-service hand over. Care should be taken to ensure that the ownership of these assets is agreed (especially in regards to a failure event) – the following should be considered:
- Who owns the asset?
- Who is accountable for maintenance issues?
- Who is the prime contact in the event of an issue?
It should be noted however that for a lift or escalator to be brought into beneficial use then they both should have undertaken the relevant testing and have been signed off by the manufacturer as compliant and fit for service, this will typically mean that the EN115 or EN81 test documentation has been successfully completed, signed and issued.
There may be other circumstances where a certificate of thorough examination is required, this is especially relevant for modernisation or refurbishment works (new installations do not legally require this until the end of the first 6 months of use). Finally, there are a number of issues that may occur during the Beneficial Use;
- The wear and tear associated with the period and the acceptance, or otherwise, that not all of the installation is ‘new’ at the end of the period.
- The dust associated with construction can lead to the need for a thorough clean of the entire installation, including the replacement of such items as filters.
- Adequately, protecting the equipment during the period if the construction team are planning to use the equipment to transport people or materials.
[edit] Maintenance issues
From the perspective of the quality professional the key maintenance issues that can be influenced and improved during the design and installation process include the following:
[edit] Lifts
- Lift car push buttons: product early failure, are they adequate for the environment? eg – car park lifts should have anti-vandal buttons fitted.
- Lift car doors: product early failure, are they adequate for the environment? eg – lifts for the use of ‘buggies’ or other heavy duty equipment should have adequately robust doors selected. Are the inner and outer doors aligned correctly? – This can cause lift entrapments.
- Lift car lighting: light failures – could LED be fitted? Are light fittings robust enough for the environment?
- Lift car flooring: is the floor selected adequate for the environment? Has the floor covering been laid correctly? Does the floor specification meet the correct specifications for slip resistance?
- Lift ropes: unlikely to be due to an early product failure but could be related to a poor installation, was the ITP followed and signed off by a competent person?
- Lift controller: early product failure, was the control system set-up and commissioned correctly?
- Lift intercom: phone line adequacy to be confirmed – does it meet the lift intercom requirements? Has any third party works taken place that could cause a phone line failure?
- Mechanical: bearings, motors, gearboxes can all fail due to early product failure, lack of maintenance or when life expired. Maintenance regimes should be designed to prolong the life of these components and checks should be completed to identify these potential failures before they occur. The use of CBM (condition based monitoring) can also assist in the prediction of component failure though very few of the lift manufacturers offer this facility.
[edit] Escalators and passenger conveyors
- Steps / Pallets: foreign object damage can cause fins to wear to an unacceptable level, something as small as a screw stuck in the comb-plate can cause the step fins to wear quickly – checks should be made before handover to ensure none are present. Steps and pallets can become damaged when third party equipment is placed or transported on the machine. Have the temporary works been adequately designed? What level of protection has been put in place? What checks were completed before and after?
- Tank switches: if the safety switches on the floor plates at each end are not set correctly then this can cause the machine to cut out, this happens especially in situations where users are using trollies or suitcases and the additional weight at the entry or exit points causes the electrical limit switch to ‘bounce’ and thus stop the machine.
- Mechanical: bearings, motors, gearboxes can all fail due to early product failure, lack of maintenance or when life expired. Maintenance regimes should be designed to prolong the life of these components and checks should be completed to identify these potential failures before they occur. The use of CBM (condition based monitoring) can also assist in the prediction of component failure though very few of the escalator manufacturers offer this facility.
Article written by Adam Rumens & reviewed by David Myers on behalf of the Construction Special Interest Construction Working Group (ConSIG CWG). Article peer reviewed and accepted for publication by CONSIG 09 / 08 / 2017.
--ConSIG CWG 14:55, 05 Jan 2019 (BST)
[edit] Related articles on Designing Buildings Wiki
- A brief history of lifts over the years.
- Assurance and self-certification.
- Considerations When Installing a Residential Lift.
- Design freeze: a quality perspective.
- Disabled access lifts.
- Escalator.
- Firefighting lift.
- Home lifts.
- Lifting device.
- Lift Standards: EN 81-20 and EN 81-50.
- Lifts and Their Special Operating Modes.
- Lifts for office buildings.
- Low pit lifts.
- Quality culture and behaviours.
- Smart elevators.
- The importance of service lifts.
- The science of lifts.
- The world's fastest lifts.
- Types of lift doors.
- Wheelchair platform stairlifts.
Featured articles and news
Retrofit 25 – What's Stopping Us?
Exhibition Opens at The Building Centre.
Types of work to existing buildings
A simple circular economy wiki breakdown with further links.
A threat to the creativity that makes London special.
How can digital twins boost profitability within construction?
The smart construction dashboard, as-built data and site changes forming an accurate digital twin.
Unlocking surplus public defence land and more to speed up the delivery of housing.
The Planning and Infrastructure Bill
An outline of the bill with a mix of reactions on potential impacts from IHBC, CIEEM, CIC, ACE and EIC.
Farnborough College Unveils its Half-house for Sustainable Construction Training.
Spring Statement 2025 with reactions from industry
Confirming previously announced funding, and welfare changes amid adjusted growth forecast.
Scottish Government responds to Grenfell report
As fund for unsafe cladding assessments is launched.
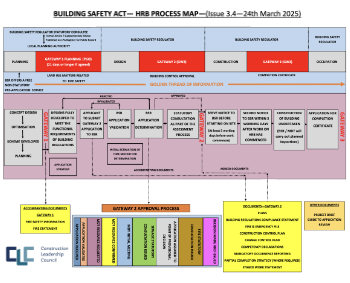
CLC and BSR process map for HRB approvals
One of the initial outputs of their weekly BSR meetings.
Architects Academy at an insulation manufacturing facility
Programme of technical engagement for aspiring designers.
Building Safety Levy technical consultation response
Details of the planned levy now due in 2026.
Great British Energy install solar on school and NHS sites
200 schools and 200 NHS sites to get solar systems, as first project of the newly formed government initiative.
600 million for 60,000 more skilled construction workers
Announced by Treasury ahead of the Spring Statement.
The restoration of the novelist’s birthplace in Eastwood.
Life Critical Fire Safety External Wall System LCFS EWS
Breaking down what is meant by this now often used term.
PAC report on the Remediation of Dangerous Cladding
Recommendations on workforce, transparency, support, insurance, funding, fraud and mismanagement.
New towns, expanded settlements and housing delivery
Modular inquiry asks if new towns and expanded settlements are an effective means of delivering housing.
















Comments
What if the onsite shaft dimensions as not as proposed by the architect in consultation with the lift supplier. For e.g. Proposed Dimensions are 1950mm*2400mm and onsite dimensions are 1950mm*2288mm. What can be done in that case??
In response to the above question:
This depends on the shaft type - is this concrete or steel / boarded?
First point is to determine the lift car size - how much clearance is there between the lift car and the shaft walls?
In the event this is a concrete shaft then this can become a significant issue as there is typically no secondary steelwork (to which the combination brackets / guides are fixed) so the ability to adjust these brackets is limited as they are fixed directly to the concrete. This will depend on the amount of clearance between the shaft walls and the lift car - is there sufficient space to install a compliant redesigned bracket?
For steel / boarded type shafts typically there is a secondary steelwork detail that is fixed to the steels within the shaft bridging the gap to the lift car/counterweight guide brackets. In this instance then a consultation with the secondary steelwork designer / installer to adjust the design to maintain the same lift car size could usually be quite easy to do (cost / programme impact aside)
In the worse case then the lift car size will need to adjusted to suit the reduced shaft size.
In my experience the lift supplier will not take 'handover' of the shaft if it doesn't meet the required dimensions.